PDF Export and Print
Findings makes it very easy to share your experiments and protocols with anyone, even those who don’t use Findings, thanks to the flexibility and power of the PDF export functionality. Your lab notebook has never looked so neat!
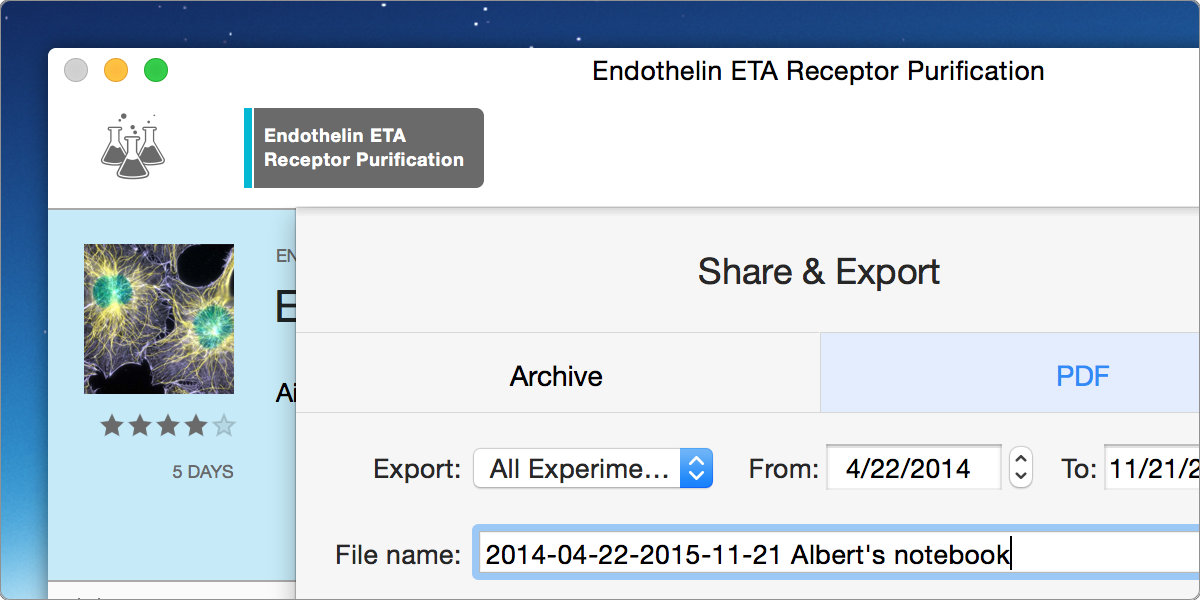
In our previous blog post, I told you everything about sharing your experiments and protocols using the new Findings archive format. But what if you want to share your lab notebook with colleagues that don’t use Findings yet, or worse, don’t even have a Mac? No worry, we got you more than covered with our powerful PDF export functionality. We made sure that all the bells and whistles are there to fully control the output. And with batch export, you can easily maintain a PDF archive of all your work. This works as a future-proof backup, but also as a powerful collaboration tool: using any file-sharing system like Dropbox, you can make sure your teammates are always up to date. Let’s dive right in!
Export experiments, projects or your whole library
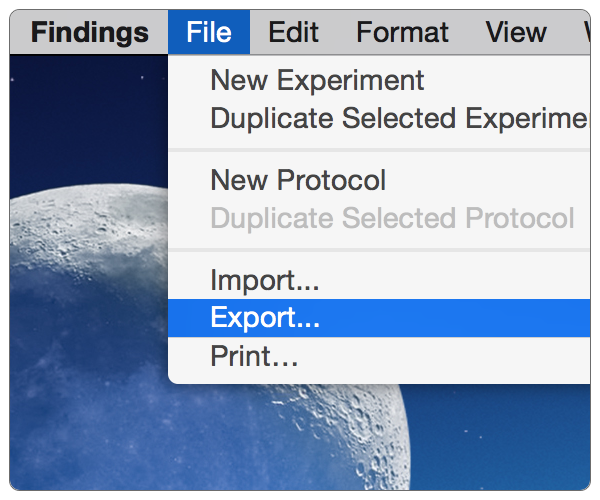
To create a PDF from your documents, select an experiment or a protocol and select the item ‘Export’ in the ‘File’ menu.
The export sheet offers many different options. To start, let’s focus first on the export format and the experiment selection
- Export format: choose ‘PDF’ (the ‘Archive’ format was covered previously).
- Experiment selection: export either the current experiment, an entire project or your entire library; you can filter the list of documents further based on a range of dates.

The export sheet in Findings
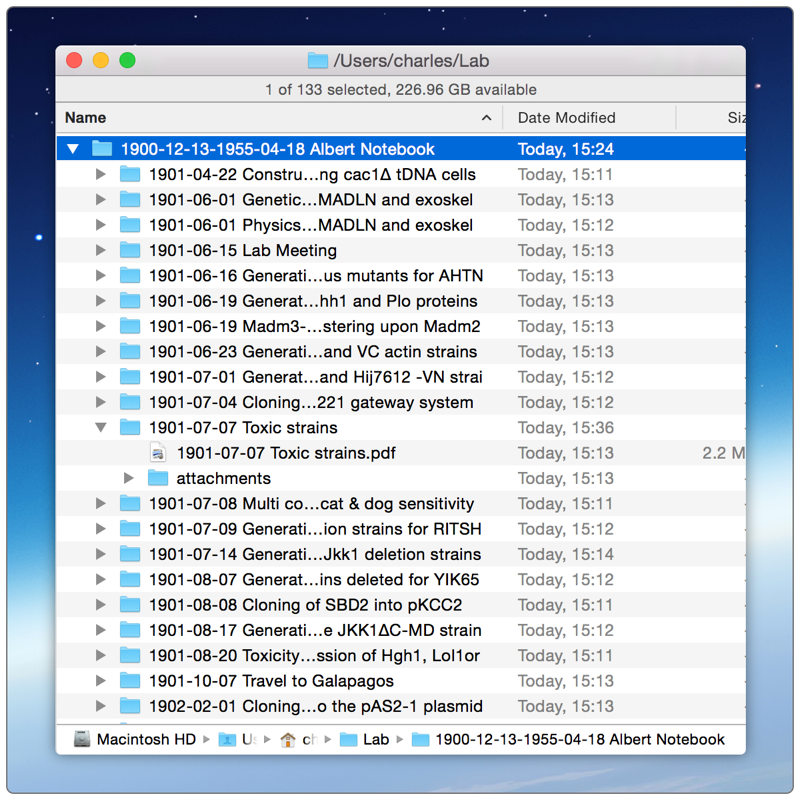
Export to disk. We will look into the other options soon, but if you just use the default settings, you can then click the ‘Export’ button and choose where to save the resulting PDFs.
By default, the export includes the attachments. Each experiment or protocol is thus exported to a folder, which contains not just the PDF output of the text content, but also a subfolder with all the attachments. When you export multiple documents, you thus get a list of folders, automatically named and neatly organized for you.
By saving this on a shared filesystem (Dropbox, Google Drive, network drive, etc.), you could then easily give access to your lab notebook to your colleagues. You can then add new projects, new experiments or new protocols as you go. Wether they are on Mac, Windows, Linux, Android, iOS, and wether they have Findings or not, your teammates will have access to a nicely structured view of your work, from anywhere and at any time.
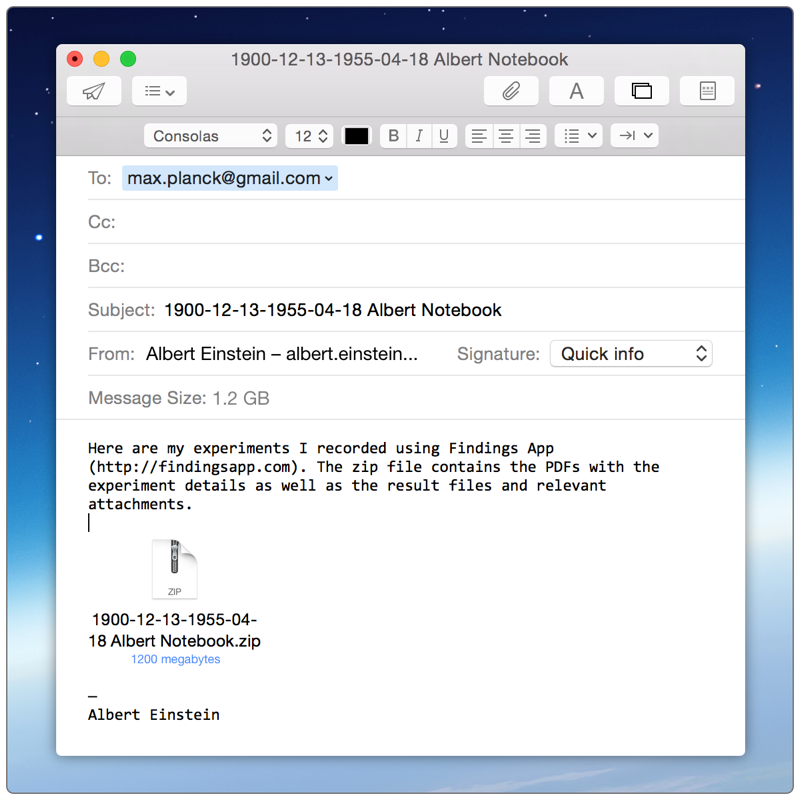
Share via email. You can just as easily use the ‘Share’ button to send the resulting PDFs by email. In this case, to avoid file transfer issues and to reduce the size of the output, all the files are automatically combined for you into a single zip archive, before adding it to a pre-filled email. You can also directly share via Messages or Airdrop.
Now, let’s examine in more details how you can customize the content of the generated folders and PDFs.
Attachments
There are two different options related to attachments:
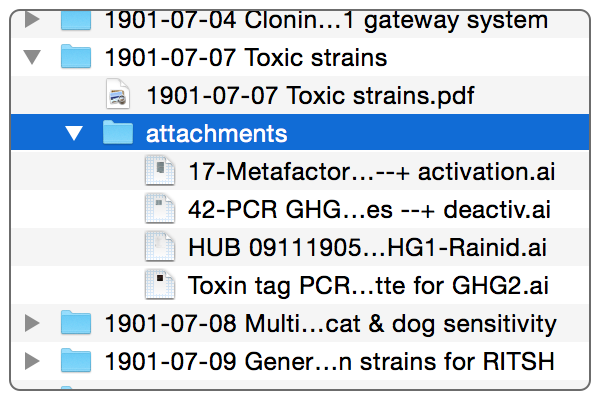
Attachment files. They are included by default, but if you unselect the option, Findings will only generate the PDF, and will create neither the parent folder nor the ‘attachments’ subfolder. This can be useful if you only need a printable version of your lab notebook.
Attachment previews.
 When possible, Findings generates a preview of attachments using available QuickLook plugins, and resizing them to a sensible dimension.
By default, Findings will select the ‘Medium’ size to incorporate into the text of the document. This puts a limit on both the horizontal and vertical dimensions of the image output. You can choose between 3 different sizes, small, medium or large. You can also opt out completely and not include any preview at all.
Custom text styling
There are 3 options to customize the text appearance in your PDFs:
- Optimized for print. For this default option, the font and font size were chosen to output nice-looking and legible text, better adapted to a printout.
- Same as Findings editor. If you prefer to have text that looks just like what Findings displays on screen, that’s the way to go.
- Custom. If you have very specific needs, pick the font and font size you prefer. Make it big, make it small, do as you wish! But remember: with great power, comes great responsibility.
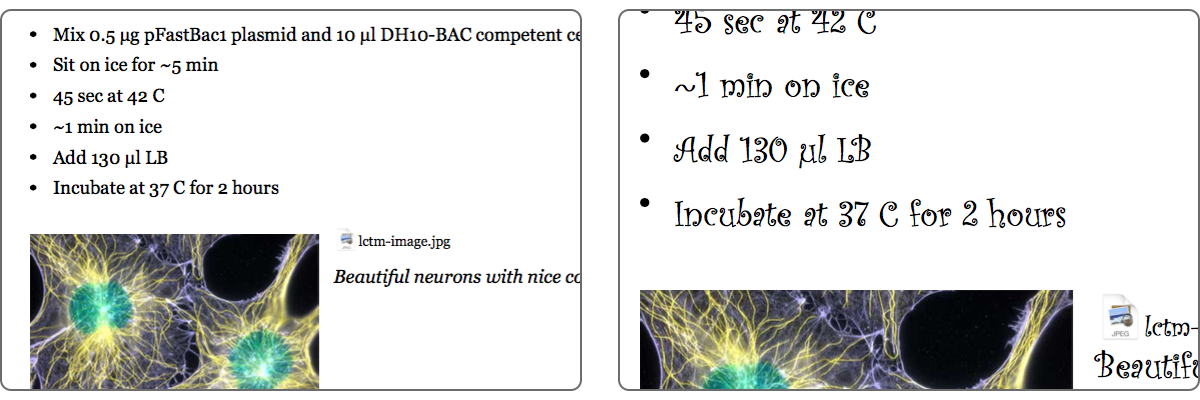
Pick your font wisely, not just based on your mood.
Export & Printing
Findings will conveniently remember all the settings for the next time you export to PDF, and will also apply them to printing. In fact, printing is very much the same as PDF export, only faster and easier when you just have one document to output, and don’t need to deal with attachments. For example… uh… when you need to print.
Let's summarize. Findings makes your life easier, so you can do more with less work. With easy export and printing, it makes everybody’s life around you easier as well. Your colleagues will thank you and they will be impressed. Win-win!

“Who’s beautiful handwriting is this?”
That’s it for today! If you have questions, comments, or suggestions, on this topic or any other, let us know via email to feedback@findingsapp.com, to @findingsapp on Twitter or on our Facebook page.